Installation Instructions
All our products are Easy-to-Install, but if you don’t have the time or the tools, contact one of these professional installers.
Free Shipping US & Canada Wide
No Tax In USA
Professional Installation
All our products are Easy-to-Install, but if you don’t have the time or the tools, contact one of these professional installers.
In the U.S. 
Our U.S. customers can contact:
 &
& ![]() &
& ![]()
In Canada
Our Canadian customers can contact:
& ![]() &
&  &
& ![]() &
& ![]()
Tools Required
Tape Measure
Drill
Screwdriver
Pencil
Installation Tips
Follow these tips to ensure trouble-free installation of your MR. GOODBAR® Security Bars:
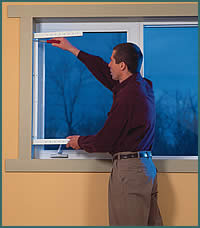
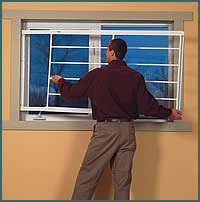
- Bars may be mounted either inside the window frame or on the surface of the window trim.
- UNIVERSAL MOUNTING BRACKET is hinged to fit any mounting angle.
- Bars may be mounted with lock on either left or right side.
- The nylon plug on our hinged bars is for shipping purposes only and should be discarded and replaced with a padlock or our Keyless Quick Release locking system.
- Small lead inserts are provided with your mounting hardware to make the screws tamper resistant. After the bars are installed, tamp the inserts into the screw heads. Place insert on clear tape, affix over the head of the screw and tap in with a hammer.
- MR. GOODBAR® Security Bars using the Keyless Quick Release Locking System must be mounted no deeper than 1″ from the wall surface.
Step By Step Installation
|
  |
Notes about emergency exits and security bars:
Typically, windows in sleeping rooms and in basements with habitable space are used as a secondary means of escape and should be secured with our Keyless Quick Release Locking System (sold separately). Consult your local building and fire codes or ask your local fire department to recommend secondary escapes.
MR. GOODBAR® The Original Home Security Bars and #1 selling security bars in Canada.

INFORMATION
CUSTOMER ASSISTANCE